Whether you love having family cookouts or enjoying a quiet cup of coffee and watching the sun rise before the kids get up, decks are a great way to add some outdoor space to your home. However, decks are also subject to the harsh seasons and need lots of TLC throughout the year to keep them safe and looking great. Learn how to care for your wood deck for each season and keep it a serene retreat instead of an eyesore.
Maintenance Tips to Keep Your Wood Deck Looking Great
For many areas, warm temperatures only last six months or less, leaving your deck to face hasher elements for the remaining months as the seasons change. The good news is, if you focus on caring for your wood deck throughout the year, you can help preserve its lifespan and keep it from looking weathered.
1. Combat the Top Causes of Deck Wood Deterioration
Depending on where you live, the causes of deck wear and tear may vary, but these are the top three culprits:
2. Inspect Your Deck
Part of maintaining your wood deck is to inspect it yearly. Before you begin, clear the deck of any furniture or toys and sweep away larger debris.
Deck Inspection Checklist
Pro Tip: If the spot with rot is smaller than a silver dollar, it can be removed and treated with wood preservative. A larger area may require the structural member to be replaced and you’ll need to contact a professional.
When You Should Do This: Late spring or early summer when the weather is dry Tools Needed: Flat-blade screwdriver, flashlight Cost: Free
Don’t have a screwdriver set? Check out our list of essential tools every homeowner and DIYer should have in their toolbox.
Building Codes for Decks
During your annual deck inspection, it’s important to not only make sure it’s structurally safe, but also up to code. Some requirements to keep your eye out for during your inspection are:
Wondering if the rest of your home is up to code? Check out the most common housing code violations .
3. Replace Rotten Deck Boards
Replacing deck boards can be thought of as performing surgery on your deck if you’re replacing one rotten board amongst other healthy ones. Make sure you know what species your deck wood is so you can try to closely match the existing boards.
Pro Tip: Flatten the tip of the nail or deck screw before driving it into the board to reduce splitting.
You may want to enlist some help for this DIY project or hire the help of a professional to make sure you are safely replacing the boards and your updated deck will be up to code.
When You Should Do This: Late spring or early summer when the weather is dry Tools Needed: Long replacement deck boards, tape measure, circular saw, drill, hammer, pry bar, safety glasses, hearing protection, extension cord Cost: $21 a day circular saw rental, $150 for additional tools, about $25 per replacement board
4. Fix Loose Nails
A very common issue with wood decks involves deck nails and screws popping up out of the boards. They should be fixed quickly not only to maintain the integrity of the deck, but also for safety reasons. Nails most often pop out of the wood because of extremely hot or cold weather.
You have two options for fixing loose deck nails:
When You Should Do This: Spring or summer Tools Needed: Hammer, nails, deck screws Cost: $9-$11 for hardware
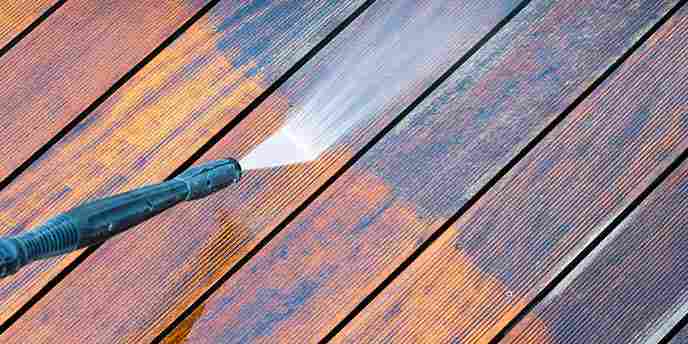
5. Clean and Stain Your Deck
Washing away the residue from fall and winter is essential to starting off your outdoor season on the right foot to avoid mold and mildew, which can cause rot.
If you are using a pressure washer, make sure you are using the lowest possible pressure that will still be effective. Pressure for soft wood, like pine or cedar, should be 500 to 600 pounds per square inch. It’s a good idea to test an inconspicuous area like a stair tread to make sure it won’t damage your wood.
When You Should Do This: Spring Tools Needed: Pressure washer (you can rent one from your local home improvement store) Cost: Around $26 for a four-hour minimum
Deck Sealer vs. Deck Stain
Deck sealer and deck stain may seem to serve the same purpose to protect your wood from the elements, but they do offer different benefits.
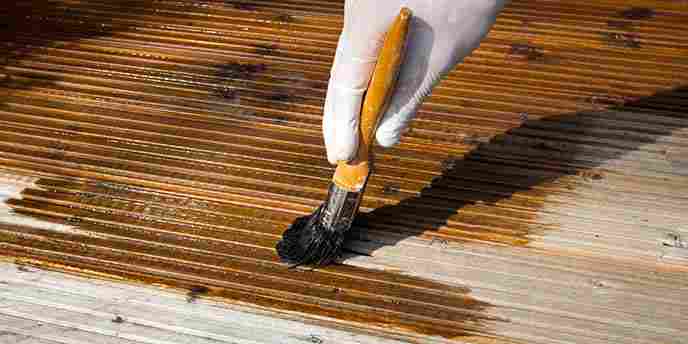
A deck sealer is a clear coat you can apply to your wood deck to help prevent water from penetrating your boards. While it is a great moisture repellent, it does not protect from the sun’s harmful UV rays, which can dry out your deck boards, causing cracking and splintering. Your sealer will need to be reapplied yearly, but the good news is, it’s fairly simple to do yourself.
A deck stain has similar moisture protection qualities, but also offers UV protection. The darker the color of stain you choose, the more your wood will be shielded from the harmful rays. Wood stain is more expensive than sealer, but it lasts up to five times longer and looks more professional when applied correctly.
When You Should Do This: Late spring or early summer Tools Needed: The stain or sealant of your choice, paint roller, paint brush, protective gloves Cost: Around $45 per gallon of stain, $35 per gallon of sealer, $30 for tools
Deck Staining Tips
6. Protect Your Deck From the Winter Weather
Preparing your deck to survive the harsh winter weather is important to keep it looking healthy for the next warm season. One way to protect it from snow and ice is so lay a tarp down before the first snow to create a barrier and prevent warping and moisture buildup. If you forgo the tarp, make sure to shovel your deck to clear off built up snow with a plastic shovel or using a broom.
If your deck isn’t being used as an entrance or exit to your home, you can usually skip shoveling and let the snow melt. If you do choose to shovel, make sure to do it parallel to the deck boards to avoid damage.
Avoid using salt or ice melting products on your wood deck to avoid any damage to your finish or discoloration. If you can’t avoid it, a good option for ice removal that will be safer for your wood deck is a calcium chloride-based ice melt that is safe for pets, wood and the environment.
When You Should Do This: Winter Tools Needed: Plastic shovel or broom, tarp and calcium chloride-based ice melt Cost: $50 for 20-by-30-foot tarp, $87 for 25-pound bucket of ice melt
Maintaining Different Deck Wood Types
While all wood decks require some type of maintenance, the species of wood that your deck was built with can impact the way you maintain it. It’s important to take the time to know what your deck is built from and how to care for it long-term.
Pressure-Treated Wood
While this wood is a cost-effective option, it is high-maintenance and needs to be power washed, stained and sealed annually or bi-annually. The boards do shrink in size over time, which can cause cracking and splintering. It may not be the best option for families with pets or children, because the splinters can cause infections due to the chemicals the boards are treated with.
Soft Woods
Redwood and cedar are two popular soft wood possibilities that are a step up from pressure-treated lumber. These woods are naturally rot resistant, but like any other decking material, the elements can cause natural wear and tear, so soft wood decks need to be cleaned and sealed annually.
Hard Woods
Hard wood decking options usually outperform pressure-treated wood or soft wood in terms of weather resistance and durability. That does mean that the overall cost is slightly higher for woods such as teak, cherry and oak, but they may be a better choice in the long run. You can let your hard-wood deck age and change colors naturally, but if you want to maintain its color, stain the boards with a UV-blocking stain once a year.
When Checking Your Deck, Always Keep Safety in Mind
If your deck is beyond an eyesore, it may not be safe for you or your family to use anymore. You may want to consider tearing it down and starting fresh. Our step-by-step guide to removing your deck will help even the most beginner handyman tackle this project.

